
 The moment a little one starts crawling or toddling, everyday items around the house suddenly look like potential hazards. Childproofing your home might feel overwhelming at first, but taking some practical steps can make your space a much safer place for kids.
It can be hard to spot everything that might need attention, especially if you haven’t had to think about sharp corners or stair gates before. By walking through each area of your home and putting yourself in your child’s shoes, you’ll start to notice things you probably missed

.www.wealthyaffiliate.com?a_aid=a12e49d9
This guide covers what you need to know and actually do to create a childfriendly home. I’ll break down the process into simple steps with plenty of real life tips so you can tackle childproofing with confidence.
Step 1: Assess Each Room Carefully
Every home is different, so it’s smart to start by checking out each room from a child’s perspective. Crawl on the floor if you need to; seriously, it helps! You’ll notice cords, sharp edges, and small objects a lot more clearly this way.
Questions to Consider:
- Are there loose items, small toys, or choking hazards within reach?
- Can furniture tip if climbed on?
- Are cleaning supplies or medications stored low?
- Which windows, stairs, or doors could be opened by a curious toddler?
Common Hotspots for Hazards:
- Under sinks (cleaners, chemicals)
- Bathrooms (medicines, sharp objects, water)
- Bedrooms (cords, jewelry, small electronics)
- Living areas (TVs, bookshelves, decor)
Jot down anything that pops out as unsafe, making a checklist for each room can keep the process much more organized. Don’t forget to check closets, hallways, and even those corners you rarely use—a lost button or a dangling blind cord can sneak up on you.
Step 2: Tackle Major Safety Zones (Kitchen, Bathroom, Stairs)
Certain areas call for extra attention, as these spots tend to have the most risks for little explorers. Here’s how I usually approach them:
Kitchen Safety Tips:
- Install safety latches on drawers and cabinets, especially the ones with cleaners, sharp tools, or glassware.
- Keep appliances like toasters, blenders, and kettles out of reach. Unplug them when not in use and coil cords away from edges.
- Use stove knob covers and place hot pots on back burners. Always turn handles away from the edge.
- Move plastic bags, foil, and cling wrap high up or into locked drawers.
- If possible, use an oven lock to prevent accidental burns from curious hands.
Bathroom Hazards to Watch:
- Put medicine and razors in a high or locked cabinet.
- Add a toilet lock to stop curious kids from splashing or dropping things in.
- Keep the bathtub free of slippery toys and always empty it right after use.
- Use antislip mats inside and outside the tub.
- Store hair dryers and other electrical items far away from water when not in use.
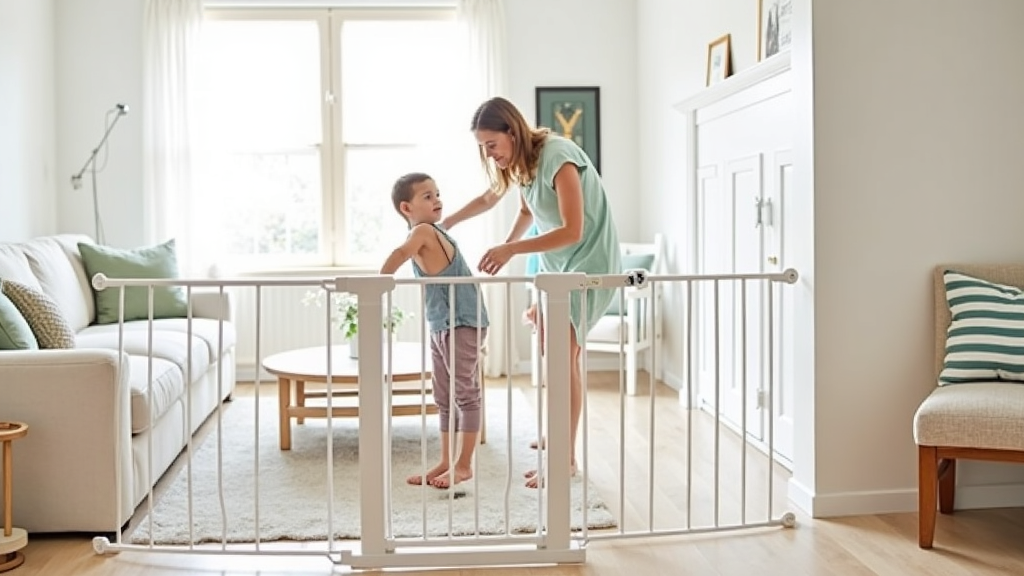
Securing Stairs and Windows:
- Install safety gates at the top and bottom of stairs. Opt for hardwaremounted gates where a fall is possible.
- Windows above the ground floor should have window guards so they can’t be opened wide enough for a child to fall through.
- Keep furniture away from windows to prevent climbing.
- For doors that lead outside, use knob covers or high locks to keep little ones from wandering off.
Step 3: Minimize Electrical and Furniture Dangers
Cords and outlets always seem to catch a child’s attention. Taking a few simple steps around your electronics and furniture can reduce accidents, especially in living areas where kids spend a lot of time.
Electrical Safety Ideas:
- Use outlet covers or safety plates for every unused plug kids can reach.
- Bundle and shorten long cords with cord wraps or covers. Try to hide them behind heavy furniture where possible.
- Keep chargers, extension cords, and electronics up high or in drawers.
- Check lamps and nightlights for frayed cords and replace if needed.
Securing Furniture and TVs:
- Anchor tall furniture (dressers, bookshelves, TVs) to the wall using antitip straps.
- Move unstable furniture out of high traffic areas.
- Stick soft bumpers on sharp corners of tables and low shelves.
- Store remote controls and knickknacks out of reach.
- Use drawers stoppers so children can’t pull them out completely.
Don’t forget to check spaces behind sofas or under beds for stray coins, batteries, or other choking hazards. Small toys, hair clips, and even pieces of food can be tucked away and easily overlooked.
Step 4: Stop Choking, Poisoning & Suffocation Risks
Many childhood accidents involve small items or dangerous substances getting into little hands or mouths. Staying on top of these can make a huge difference for your peace of mind.
Reducing Choking Hazards:
- Regularly scan floors and low surfaces for beads, buttons, coins, magnets, and batteries.
- Keep small toys with removable parts in containers with lids and store them up high.
- Be careful when older kids play nearby; their toys might have tiny pieces.
- Don’t forget to check outside—pebbles and mulch can also be tempting.
Poison & Chemical Safety:
- Store all medicines, vitamins, cleaning products, and even laundry pods in high, locked cupboards.
- Use childresistant caps on anything potentially dangerous, but don’t rely on them alone.
- Have the Poison Help number handy (1-800-222-1222 in the US) for quick access in case of emergency.
- Never leave cosmetics, hand sanitizers, or essential oils within a child’s reach.
Cutting Down Suffocation Risks:
- Keep plastic bags, dry cleaning bags, and deflated balloons completely out of reach.
- Use crib sheets that fit snugly and avoid pillows or loose blankets in cribs for younger babies.
- Tuck away drapery and blind cords using cord shorteners or tanglefree hardware.
- If you use canopy beds, make sure any fabric doesn’t hang low enough for a toddler to grab.
Step 5: Make Living & Play Spaces Safer
Main living areas and playrooms can be filled with gadgets, furniture, and storage bins. A few upgrades can make these zones a whole lot safer for curious kids.
Childproofing Play Zones:
- Opt for soft covering or pads in play areas, such as foam play mats or carpets to cushion falls.
- Rotate out toys with broken or loose parts to cut down on surprises.
- If you use storage bins, make sure they’re light and don’t have heavy lids that could pinch fingers.
- Keep bookshelves secured and avoid stacking heavy toys on top.
Fireplace & Heater Protection:
- Install a heatresistant safety gate around fireplaces or wood stoves.
- Keep matches, lighters, and fire tools stashed in a locked cabinet.
- Never rely on the fireplace screen alone for safety—barriers are much more effective.
- If you use space heaters, keep them at least three feet away from play areas and unplug when not in use.
Extra Tips to Keep in Mind
- Set your water heater below 120°F (49°C) to prevent burns.
- Install door stoppers or pinch guards to protect those little fingers from slamming doors.
- Regularly test smoke and carbon monoxide detectors, and swap batteries twice a year.
- Set up emergency contacts where adults or caregivers can see them.
- Keep a first aid kit stocked and accessible to grownups.
- Teach older kids to help pick up small objects and put away toys safely.
Common Questions & Quick Fixes
How often do I need to update my childproofing?
As your child grows and gets more mobile, you’ll need to reassess about every six months or whenever they master new skills like climbing or opening doors. Sometimes you’ll find new hazards as your child gets taller or more agile, so stay flexible and keep checking your safety measures.
What if my place is small and I’m renting?
Temporary babyproofing products like pressuremounted gates, furniture straps with removable adhesives, and outlet covers work well when you can’t make permanent changes. There are also removable cabinet locks and foam edge protectors that come off cleanly at moveout.
Are all childproofing products the same?
No, definitely not. Some products can be complicated or break easily. I suggest checking online reviews and choosing items that are tested to safety standards. Look for certifications like JPMA (Juvenile Products Manufacturers Association). Where possible, test items before fully installing or relying on them—sometimes kids figure out locks more quickly than you’d think!
Next Steps: A Safer, More Relaxed Home
Making your home childfriendly doesn’t have to be a giant project. Focusing on the main risks in each space makes things more manageable. Take it one room at a time, use checklists, and stay flexible as your child grows.
Simple Action Steps:
- Go room by room to spot hazards and start a safety checklist. Even taking photos or videos while you do your walkthrough can help you keep track of areas that need attention.
- Secure furniture, block off dangerous areas, and store hazards up high. Aim to make changes bit by bit if you feel overwhelmed—every improvement makes a difference.
- Review your setup regularly as your child learns new skills. Encourage other caregivers to stay updated, too.
You’ll feel a lot more at ease once you know the basics are covered, and you might even find that everyday life runs a little smoother too. Got any questions or tips from your own experience? Share them below! Taking these steps gives everyone in your household peace of mind and lets your little one explore with more freedom and much less worry.